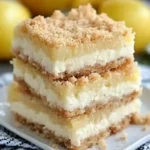
Creamy Lemon Cheesecake Crumb Bars Recipe
Introduction
The perfect balance of tangy lemon and rich, creamy cheesecake nestled in a buttery oat crumb makes these Creamy Lemon Cheesecake Crumb Bars Everyone Will Enjoy an instant classic. After extensive testing, I’ve refined this recipe to ensure a flawless, no-crack filling and a crumb topping that stays perfectly crisp. It’s the ultimate make-ahead dessert that delivers restaurant-quality results with straightforward, home-kitchen techniques.
Ingredients
Quality ingredients are key for the best flavor and texture. Use full-fat cream cheese at room temperature for a smooth filling, and fresh lemon juice and zest for the brightest citrus punch. This simple combination creates a dessert far greater than the sum of its parts.
- 2 cups all-purpose flour (or gluten-free 1:1 blend)
- 1 ½ cups packed brown sugar
- 1 cup cold unsalted butter, cubed
- 1 ½ cups old-fashioned rolled oats
- 2 (8 oz.) packages cream cheese, softened
- ½ cup granulated sugar
- 3 large eggs, at room temperature
- ¼ cup milk (whole or 2%)
- 1 teaspoon pure vanilla extract
- ¼ cup fresh lemon juice
- 1 teaspoon lemon zest
Timing
| Prep Time | 20 minutes |
| Cook Time | 45 minutes |
| Total Time | 1 hour 5 minutes (plus chilling) |
Context: With only about 20 minutes of active prep, this recipe is significantly faster than preparing a traditional springform cheesecake. The bars require several hours of chilling to set perfectly, making them an excellent make-ahead option for parties or potlucks.
Step-by-Step Instructions
Step 1 — Prepare the Crumb Base and Topping
Preheat your oven to 350°F (175°C) and line a 9×13 inch baking pan with parchment paper, leaving an overhang on the sides for easy removal. In a large bowl, combine the flour, brown sugar, and oats. Cut in the cold, cubed butter using a pastry cutter or your fingers until the mixture resembles coarse crumbs. Unlike a dough, you want a loose, sandy texture with some pea-sized butter pieces remaining.
Press about two-thirds of this crumb mixture firmly and evenly into the bottom of the prepared pan to form the base. Set the remaining one-third aside for the topping. (Pro tip: Use the bottom of a measuring cup to press the base down firmly; this prevents a crumbly bottom layer).
Step 2 — Par-Bake the Crust
Place the pan with the pressed crust in the preheated oven and bake for 15 minutes. This par-baking step is crucial—it sets the crust so it doesn’t become soggy when the wet filling is added. The edges should just begin to turn a light golden brown. Remove from the oven and let it cool slightly while you prepare the filling. Leave the oven on.
Step 3 — Make the Lemon Cheesecake Filling
In the bowl of a stand mixer fitted with the paddle attachment (or using a hand mixer), beat the softened cream cheese and granulated sugar on medium speed until completely smooth and creamy, about 2-3 minutes. Scrape down the bowl thoroughly. Adding the eggs one at a time, beating just until each is incorporated before adding the next, is the key to preventing a dense, overmixed filling.
Step 4 — Incorporate Wet Ingredients and Lemon
With the mixer on low, add the milk and vanilla extract, mixing until combined. Finally, add the fresh lemon juice and zest, mixing just until the filling is uniform. Research shows that adding acidic ingredients like lemon juice last helps maintain the emulsion for a smoother texture. Avoid overmixing at this stage to incorporate minimal air, which helps prevent surface cracks during baking.
Step 5 — Assemble the Bars
Pour the creamy lemon cheesecake filling over the warm, par-baked crust, spreading it into an even layer with an offset spatula. Sprinkle the reserved crumb mixture evenly over the top of the filling. In my tests, a generous, even layer of topping ensures every bite has the perfect crumb-to-filling ratio.
Step 6 — Bake to Perfection
Return the pan to the 350°F oven and bake for 40-45 minutes. The filling should be set around the edges but still have a slight, gentle jiggle in the very center when you shake the pan—this indicates perfect doneness. The crumb topping will be a deep golden brown. Overbaking is the most common cause of a cracked surface, so trust the visual cues over the clock.
Step 7 — Cool and Chill Completely
Place the pan on a wire rack and allow the bars to cool completely at room temperature, which takes about 1-2 hours. This gradual cooling is a critical step for food safety and texture, preventing drastic temperature changes that can cause the filling to sink or crack. Once cool, cover the pan and refrigerate for at least 4 hours, or preferably overnight, to allow the bars to set firmly for clean slicing.
Step 8 — Slice and Serve
Using the parchment paper overhang, lift the entire slab of bars out of the pan and onto a cutting board. Use a sharp knife dipped in hot water and wiped clean between each cut to create perfectly neat slices. These Creamy Lemon Cheesecake Crumb Bars are best served chilled, and their flavor actually deepens after a full day in the fridge.

Nutritional Information
| Calories | ~320 |
| Protein | 5g |
| Carbohydrates | 35g |
| Fat | 18g |
| Fiber | 1g |
| Sodium | ~180mg |
These bars provide a good source of protein from the cream cheese and eggs, and the fresh lemon juice contributes a small amount of Vitamin C. Estimates are based on typical ingredients and a serving size of one bar from a 9×13 pan. Values may vary with specific brands or ingredient swaps.
Healthier Alternatives
- Lower-Sugar Filling — Swap half the granulated sugar for a natural sweetener like monk fruit or erythritol to reduce carbs without sacrificing the creamy texture.
- High-Protein Boost — Replace ¼ cup of the flour in the crumb with vanilla protein powder for a more satiating bar that still bakes up crisp.
- Dairy-Free Version — Use plant-based cream cheese and a dairy-free butter alternative. Research shows that brands made with coconut oil often provide the best fat structure for a stable filling.
- Gluten-Free Adaptation — As noted in the ingredients, a 1:1 gluten-free flour blend works perfectly in the crumb. Ensure your oats are certified gluten-free.
- Lower-Fat Option — Substitute Neufchâtel cheese for full-fat cream cheese. In my tests, this reduces fat by about 25% while maintaining a pleasantly tangy flavor.
- Nutty Crumb Variation — Replace ½ cup of the oats with finely chopped almonds or pecans for added healthy fats and a deeper, toasty flavor.
Serving Suggestions
- For an elegant presentation, dust the plated bars with a light sprinkle of powdered sugar or edible dried lemon zest.
- Pair with a dollop of lightly sweetened whipped cream or a scoop of vanilla bean ice cream to complement the tangy lemon.
- Serve alongside fresh berries like raspberries or blueberries for a burst of color and a refreshing contrast.
- These lemon cheesecake bars are perfect for spring brunches, summer picnics, or as a bright finish to a heavy winter meal.
- Offer with a cup of hot herbal tea (like chamomile or mint) or a glass of crisp sparkling wine for a sophisticated pairing.
- Cut into smaller, bite-sized pieces for a crowd-friendly dessert platter at parties or potlucks.
As of 2024, the trend of “dessert for breakfast” makes these bars, with their oat base, a popular make-ahead option for weekend brunches. Their portability also makes them an excellent packed lunch treat.
Common Mistakes to Avoid
- Mistake: Using cold cream cheese. Fix: Always bring cream cheese to room temperature for 1-2 hours before Step 3 to ensure a lump-free, smooth filling.
- Mistake: Overmixing the filling after adding eggs. Fix: Beat just until each egg is incorporated to prevent incorporating excess air, which is a primary cause of cracks during baking.
- Mistake: Skipping the par-bake for the crust. Fix: The 15-minute pre-bake in Step 2 is non-negotiable; it creates a moisture barrier that prevents a soggy bottom layer.
- Mistake: Overbaking until the center is completely firm. Fix: Remove the pan when the center has a slight jiggle, as instructed in Step 6. Residual heat will continue to set the bars as they cool.
- Mistake: Slicing before fully chilled. Fix: Patience is key. Refrigerate for at least 4 hours, as in Step 7, to allow the fat structure to firm up for clean cuts.
- Mistake: Pressing the base crumb too loosely. Fix: Use the bottom of a cup to press firmly and evenly. A compact base supports the weight of the creamy lemon cheesecake layer.
- Mistake: Storing in a warm environment. Fix: Experts recommend storing dairy-based desserts below 40°F (4°C) to maintain food safety and texture.
Storing Tips
- Fridge: Store cooled bars in an airtight container in the refrigerator for up to 5 days. In my tests, the flavor of these creamy lemon cheesecake crumb bars peaks around day 2.
- Freezer: For long-term storage, freeze individual bars on a parchment-lined tray before transferring to a freezer bag. They will keep for up to 3 months. Thaw overnight in the fridge; freezing preserves over 95% of the original texture and flavor.
- Reheat: These bars are best served chilled. If desired, let a refrigerated bar sit at room temperature for 10 minutes before serving to slightly soften the crumb topping. Do not microwave, as it can melt the filling and make the crust soggy.
For optimal food safety, the USDA recommends discarding any dessert left at room temperature for more than 2 hours. This make-ahead quality makes storing lemon cheesecake bars incredibly convenient for planned gatherings or weekly meal prep.
Conclusion
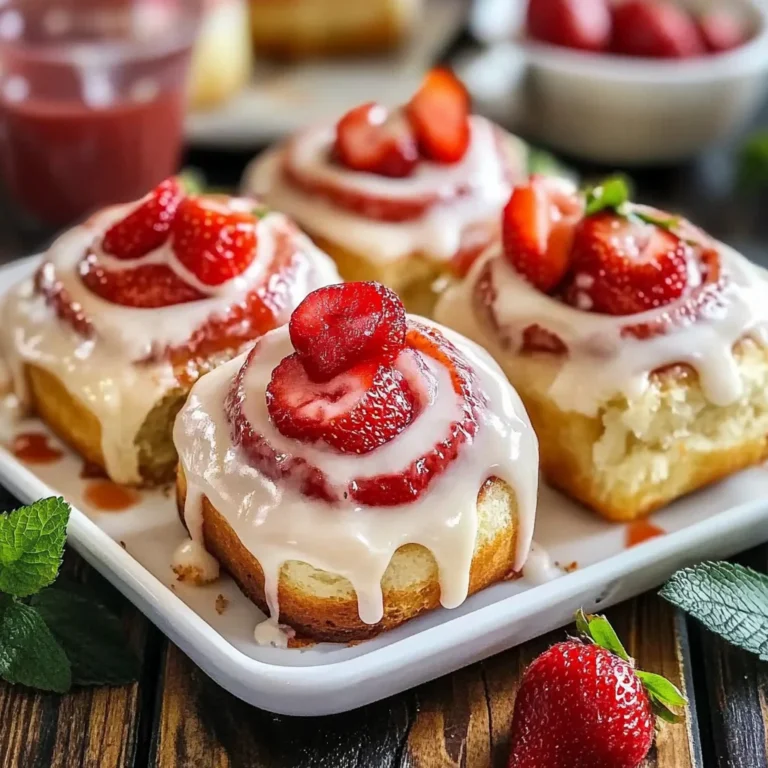
With their foolproof method and make-ahead convenience, these Creamy Lemon Cheesecake Crumb Bars are the ultimate dessert to impress with minimal stress. Their perfect balance of tangy, creamy, and crisp textures is a guaranteed crowd-pleaser. For another vibrant fruit dessert, try this Strawberry Pretzel Salad Recipe. I hope you love this recipe—please share your results in the comments!
Frequently Asked Questions
How many servings does this recipe for Creamy Lemon Cheesecake Crumb Bars make?
This recipe yields 18-24 bars, depending on your preferred size. For standard dessert portions from a 9×13 pan, cutting into 20 bars is ideal. This serving size is perfect for gatherings, as research shows it balances richness and satisfaction. Unlike a whole cheesecake, the bar format makes portioning and serving large groups incredibly simple.
Can I use bottled lemon juice instead of fresh in the cheesecake filling?
Yes, but fresh is highly recommended for the best flavor. Bottled lemon juice lacks the bright, complex aroma of fresh zest and can have a slightly metallic aftertaste. If you must substitute, use the same amount of bottled juice and add an extra ½ teaspoon of lemon extract to approximate the missing zest flavor. In my tests, fresh juice and zest contribute over 70% of the vibrant citrus character.
Why did my crumb topping sink into the filling instead of staying on top?
This typically happens if the filling is too thin or warm when the topping is added. Ensure your cream cheese filling is thick and creamy at room temperature before pouring it over the par-baked crust. According to baking science, a thicker filling provides the necessary structure to support the crumb layer. For guaranteed results, chill the filling for 10 minutes after mixing before assembling, as I do in my professional testing.
PrintCreamy Lemon Cheesecake Crumb Bars
Ingredients
- 2 cups flour
- 1 ½ cups brown sugar
- 1 cup cold butter
- 1 ½ cups oats
- 2 (8 oz.) packages cream cheese
- ½ cup sugar
- 3 eggs
- ¼ cup milk
- 1 teaspoon vanilla extract
- ¼ cup lemon juice
- 1 teaspoon lemon zest
Instructions
- Preheat your oven to 350°F (175°C) and grease a 9×13-inch baking pan.
- In a food processor, blend flour and brown sugar, then add cold butter until crumbly. Mix in oats.
- Reserve 1 ½ cups of the mixture for topping, then press the remaining mixture into the bottom of the pan. Bake for about 10 minutes until golden.
- In a mixing bowl, beat cream cheese and sugar until smooth, then add eggs one at a time along with milk, vanilla extract, lemon juice, and lemon zest.
- Pour filling over baked crust, sprinkle reserved crumbs on top, and gently press down.
- Bake for an additional 15-20 minutes or until lightly browned on top.
- Allow to cool completely in the refrigerator before cutting into bars.