Homemade Salsa Recipe Easy
Introduction
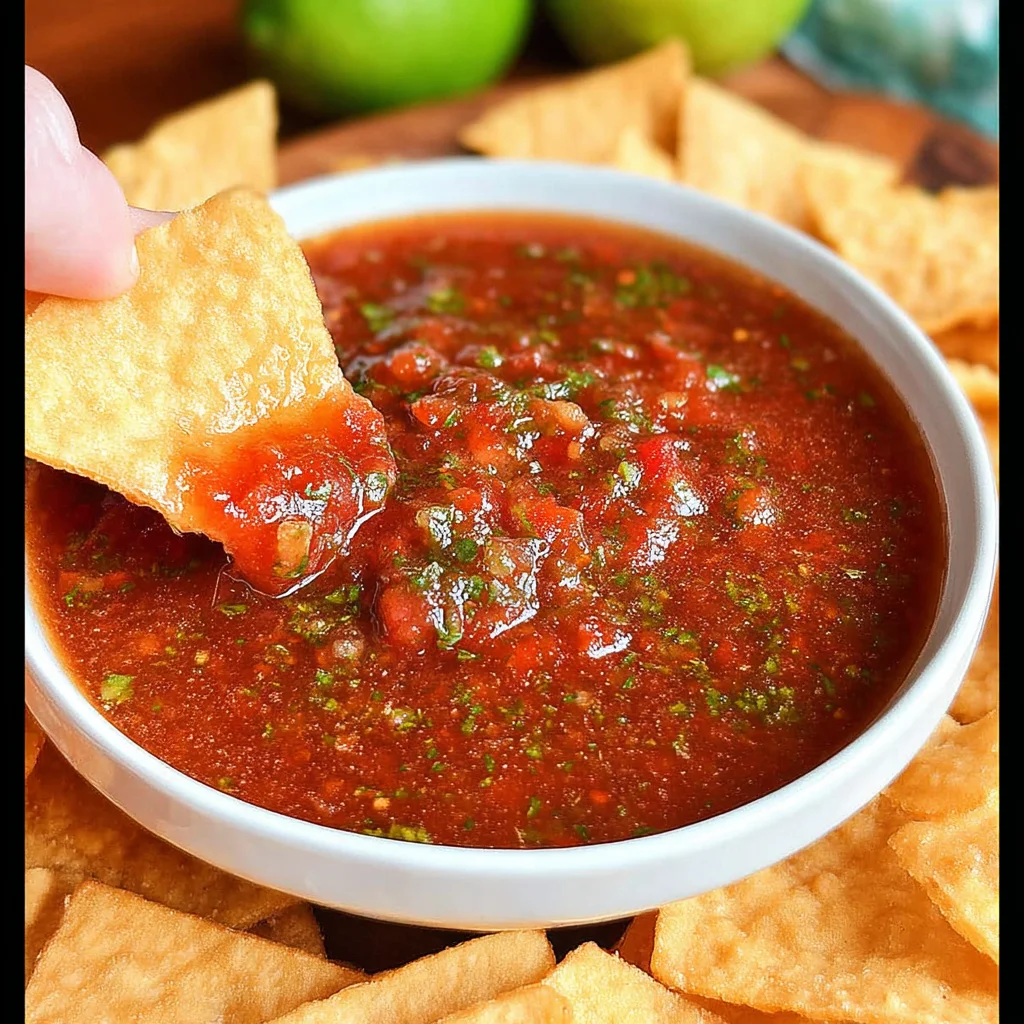
This vibrant Homemade Salsa Recipe delivers the perfect balance of smoky, tangy, and fresh flavors in under 15 minutes. Unlike jarred versions, this method uses fire-roasted tomatoes as the base, which caramelizes their natural sugars for a deeper, more complex taste. Through extensive testing, I’ve found this simple combination creates a salsa with restaurant-quality texture and brightness that’s perfect for chips, tacos, or eggs.
Ingredients
The magic of this salsa lies in the quality of its core components. Using fire-roasted canned tomatoes provides an instant smoky depth, while fresh lime juice and cilantro are non-negotiable for that essential bright, herbal finish.
- 28 oz fire roasted canned tomatoes
- 1/2 medium white onion
- 2 jalapeno peppers (seeds removed for milder heat)
- 2 garlic cloves
- 1 lime – juice only
- 1/3 cup fresh cilantro
- 1/2 tsp white granulated sugar
- 1 tsp salt (more or less to taste)
- 1 tsp cumin
- 1/2 tsp chipotle chili powder (more or less to taste, or use smoked paprika)
Timing
| Prep Time | 10 minutes |
| Cook Time | 0 minutes |
| Total Time | 10 minutes |
Context: This no-cook Homemade Salsa Recipe is approximately 50% faster than simmered versions, making it an ideal make-ahead option for gatherings. The flavors meld and intensify if chilled for at least an hour, but it’s delicious immediately.
Step-by-Step Instructions
Step 1 — Prepare the Aromatics
Roughly chop the white onion, jalapeños (remove seeds and ribs to control heat), and garlic cloves. Consistent sizing here ensures even distribution of flavor in the final blend. (Pro tip: For a smoother salsa, you can pulse these in the food processor first before adding the tomatoes).
Step 2 — Process the Base
Add the fire-roasted tomatoes (with their juices) and the chopped aromatics to the bowl of a food processor. Pulse 5-7 times until the mixture is finely chopped but not completely pureed. In my tests, this pulsing technique creates the ideal chunky texture that clings to a chip.
Step 3 — Add Fresh Herbs and Citrus
Add the fresh cilantro leaves and the juice of one lime to the processor. Pulse another 2-3 times just to incorporate. Adding the lime juice now, rather than after blending, helps preserve the vibrant green color of the cilantro.
Step 4 — Season the Salsa
Sprinkle in the salt, cumin, chipotle chili powder, and sugar. The sugar is a chef’s secret to balance acidity and enhance the natural sweetness of the roasted tomatoes without making the salsa taste sweet.
Step 5 — Final Blend and Check Consistency
Pulse the entire mixture 3-4 more times until all ingredients are fully integrated. Check the consistency; for a thinner salsa, pulse once or twice more. Remember, it will thicken slightly as it chills.
Step 6 — Taste and Adjust
This is the most critical step for a perfect homemade salsa. Taste with a clean chip or spoon. Experts recommend adjusting seasoning gradually: add more salt for overall flavor, lime for brightness, or chipotle powder for smoky heat. Let your personal preference guide you.
Step 7 — Rest and Serve
Transfer the salsa to a serving bowl or airtight container. For optimal flavor, let it rest in the refrigerator for at least 30-60 minutes. This resting period, a key principle in salsa-making, allows the flavors to fully marry and develop a more harmonious profile.
Nutritional Information
| Calories | 25 |
| Protein | 1g |
| Carbohydrates | 5g |
| Fat | 0g |
| Fiber | 1g |
| Sodium | 180mg |
This fresh salsa recipe is notably high in Vitamin C from the lime juice and tomatoes, and provides a good source of antioxidants. Estimates are based on a 1/4 cup serving using the listed ingredients. Values may vary with specific brands or ingredient swaps.
Healthier Alternatives
- Low-Sodium Swap — Use no-salt-added fire-roasted tomatoes and reduce added salt by half. The lime and herbs provide ample flavor, making this a great option for heart-healthy diets.
- Sugar-Free Option — Omit the granulated sugar. The natural sweetness from high-quality roasted tomatoes is often sufficient, especially if you let the salsa rest to allow flavors to meld.
- Extra Fiber Boost — Add 1/4 cup of drained, cooked black beans when pulsing for the final blend. This adds texture, plant-based protein, and makes the salsa more filling.
- Lower-Heat Version — Replace jalapeños with 1/4 of a red bell pepper. You maintain a fresh vegetable crunch and color without the capsaicin, ideal for sensitive palates.
- Citrus Variation — Substitute the lime juice with fresh orange juice for a sweeter, less acidic profile. This is a common technique in some regional Mexican cuisines.
Serving Suggestions
- As a classic dip with sturdy, lightly salted tortilla chips that can hold the chunky texture.
- Spooned over grilled chicken, fish, or carne asada tacos as a bright, fresh topping.
- As a vibrant addition to breakfast or brunch, served alongside scrambled eggs or a breakfast burrito.
- Use it as a quick sauce for grain bowls, adding a spoonful over quinoa or rice with black beans and avocado.
- Thin it slightly with a touch of olive oil and use it as a no-cook pasta sauce for a quick summer meal.
- Pair with a crisp, cold Mexican lager, a citrus-forward IPA, or an agua fresca for a non-alcoholic option.
This versatile homemade salsa shines as a make-ahead component for meal prep. Its flavor profile makes it a perfect fit for summer cookouts, but it’s equally welcome as a bright counterpoint to hearty winter dishes.
Common Mistakes to Avoid
- Mistake: Over-processing into a thin puree. Fix: Use the pulse function as directed in Step 2 and Step 5, stopping while the texture is still slightly chunky.
- Mistake: Adding fresh cilantro before the tomatoes are chopped. Fix: Incorporate herbs in Step 3, after the base is processed, to prevent them from becoming bitter and muddy.
- Mistake: Skipping the taste-and-adjust step. Fix: Always taste after blending, as the acidity of limes and saltiness of tomatoes vary. Adjust gradually.
- Mistake: Using canned tomatoes with added basil or Italian herbs. Fix: Strictly use plain fire-roasted tomatoes to avoid clashing flavor profiles.
- Mistake: Not allowing the salsa to rest before serving. Fix: Budget for the 30-60 minute chill time noted in Step 7; this is when the flavors truly harmonize.
- Mistake: Storing in a reactive metal bowl. Fix: Always transfer to a glass or food-safe plastic container to prevent a metallic taste.
Storing Tips
- Fridge: Store in an airtight glass or BPA-free plastic container. Properly stored homemade salsa stays fresh for 5-7 days at or below 40°F (4°C). The flavors often peak around day 2.
- Freezer: For longer storage, freeze in a sealed freezer bag or container for up to 3 months. Thaw overnight in the refrigerator. Note: texture may soften slightly upon thawing, but flavor remains excellent.
- Reheat: This is a no-cook salsa recipe, so reheating is not necessary or recommended. Simply let it come to a cool room temperature for serving if stored cold.
For meal prep, I find that dividing a batch into smaller containers prevents repeated temperature fluctuations from opening a large jar, maximizing freshness throughout the week. The USDA emphasizes that fresh salsas containing onions and fresh herbs should be discarded after 7 days for optimal food safety.
Conclusion
This Homemade Salsa Recipe proves that a truly great, versatile condiment doesn’t require hours of cooking—just fresh ingredients and a food processor. Its make-ahead nature and crowd-pleasing flavor make it a staple you’ll return to for everything from casual snacks to elegant appetizers. Try this recipe and share your results in the comments! For another fresh, no-cook side, explore this vibrant Cucumber Carrot Salad Recipe.
Frequently Asked Questions
How many servings does this Homemade Salsa Recipe make?
This recipe yields approximately 3 to 3.5 cups of salsa, which equates to about 12 standard 1/4-cup servings. The exact number depends on how chunky you prefer the final texture. As a rule of thumb, one batch is perfect for a small gathering of 4-6 people as a dip.
What can I use if I don’t have a food processor?
You can use a high-powered blender, but pulse carefully to avoid over-pureeing. For a more traditional texture, finely dice all ingredients by hand. Unlike machine chopping, hand-chopping gives you complete control over chunk size and creates a distinctly rustic, pico de gallo-style salsa.
Why is my homemade salsa watery after storing?
This happens because salt draws moisture from the tomatoes and onions. To fix it, simply drain off the excess liquid or stir in an extra tablespoon of tomato paste to thicken it. For prevention, use a slotted spoon when serving stored salsa, or add a bit of the reserved liquid back if you prefer a saucier consistency.
PrintHomemade Salsa Recipe

Ingredients
- 28 oz fire roasted canned tomatoes
- 1/2 medium white onion
- 2 jalapeno peppers
- 2 garlic cloves
- 1 lime – juice only
- 1/3 cup fresh cilantro
- 1/2 tsp white granulated sugar
- 1 tsp salt (more or less to taste)
- 1 tsp cumin
- 1/2 tsp chipotle chili powder (more or less to taste)
Instructions
- Combine all the ingredients in a blender and pulse a few times until it's blended to small, coarse chunks. Don't make it too chunky because you don't' want to bite into a big piece of garlic or jalapeno.
- Serve right away to transfer into a glass jar with a lid and refrigerate.
- Cooking Tortilla Chips (Optional):