Ultimate Peanut Butter Cup Pie – Rich No-Bake Delight
Did You Know 75% of Dessert Lovers Crave Peanut Butter & Chocolate More Than Any Other Combo?
There’s something undeniably magical about the marriage of peanut butter and chocolate. It’s a pairing that transcends generations, cultures, and even dietary preferences. And yet, so many desserts only tease us with a hint of this dynamic duo. That’s exactly why this Peanut Butter Cup Pie is a dessert game changer—it doesn’t hold back. Imagine a velvety peanut butter filling cradled in a crisp chocolate crust, topped with generous swirls of melted chocolate and crunchy peanut butter cups. This isn’t just a pie; it’s a love letter to everyone who believes dessert should be an experience.
Why This Pie Will Steal the Show at Your Next Gathering
Let’s be honest: most potlucks and dinner parties suffer from a serious case of “same-old-dessert-syndrome.” Brownies, cookies, or store-bought cakes dominate the scene, leaving guests politely nibbling without much enthusiasm. But this Peanut Butter Cup Pie? It commands attention. The moment you slice into its rich, creamy layers, the room falls silent—followed by the inevitable chorus of “Oh my gosh, you HAVE to try this.” It’s the kind of dessert that turns casual eaters into devoted fans and has people sneaking second (or third) slices when they think no one’s looking.
The Secret Behind Its Irresistible Creaminess
What sets this pie apart from other peanut butter desserts is its luxurious texture. While many recipes rely solely on whipped cream or pudding mixes, we achieve that perfect balance of richness and lightness by blending smooth peanut butter with cream cheese and just a touch of powdered sugar. The result? A filling so creamy it practically melts on your tongue, yet sturdy enough to hold its shape when sliced. And because we use real peanut butter (none of that “peanut-flavored” stuff here), every bite delivers that deep, nutty flavor we all crave.
Peanut Butter Cup Pie
A rich, creamy dessert loaded with the classic combo of peanut butter and chocolate.
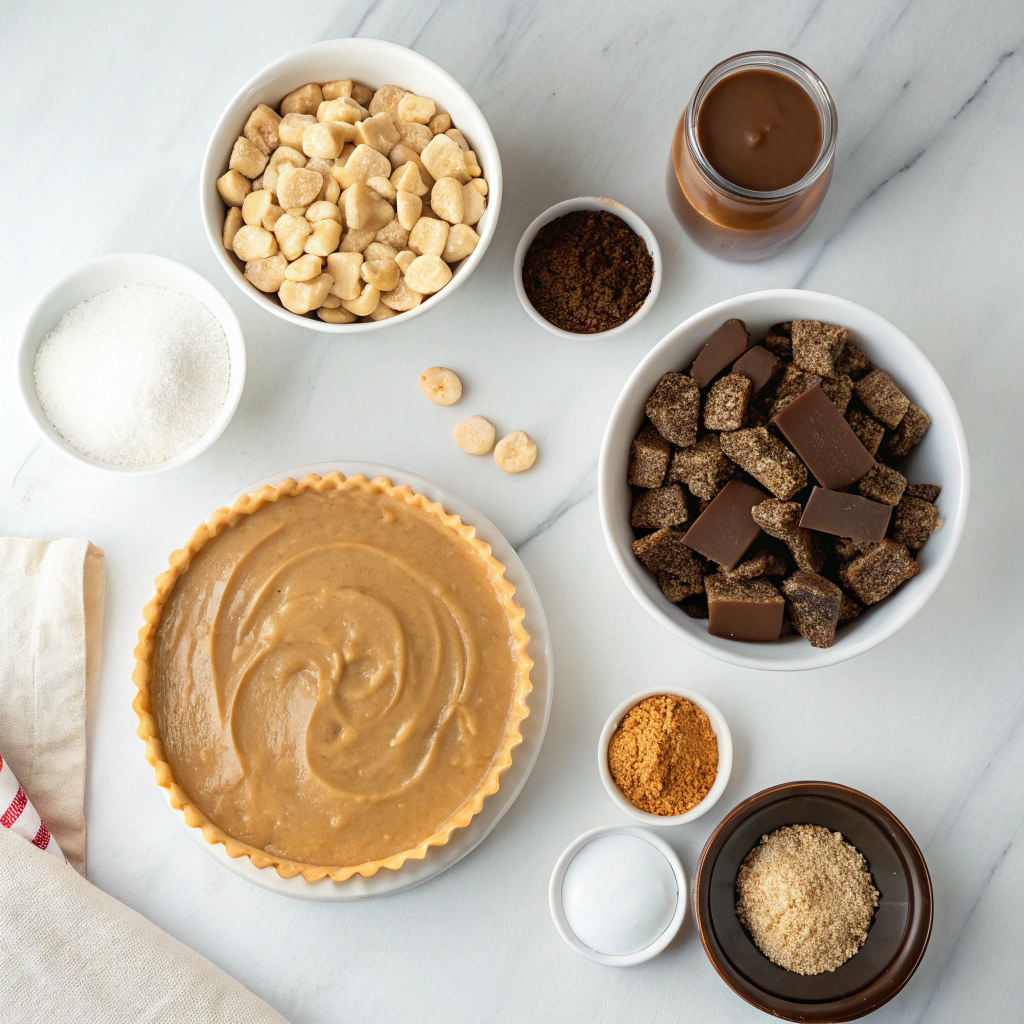
Ingredients
For the Crust:
- 1 1/2 cups chocolate cookie crumbs
- 1/4 cup melted butter
- 1 cup creamy peanut butter
- 8 oz cream cheese, softened
- 1 cup powdered sugar
- 1 tsp vanilla extract
- 1 1/2 cups heavy cream
- 1/4 cup granulated sugar
- 1 cup mini peanut butter cups, chopped
- Chocolate syrup for drizzling
Instructions
1. Prepare the Crust:
- Mix chocolate cookie crumbs with melted butter and press into a 9-inch pie dish. Chill for 30 minutes.
- Beat peanut butter, cream cheese, powdered sugar, and vanilla until smooth.
- In a separate bowl, whip heavy cream with granulated sugar until stiff peaks form.
- Fold whipped cream into peanut butter mixture until combined. Gently stir in chopped peanut butter cups.
- Spread filling into the chilled crust and smooth the top. Drizzle with chocolate syrup.
- Chill for at least 4 hours or overnight before serving.
Notes
You can customize the seasonings to taste.
Peanut Butter Cup Pie: The Dessert That’ll Steal the Show
There are desserts, and then there are experience desserts—the kind that make you close your eyes after the first bite just to savor every note of flavor. This Peanut Butter Cup Pie is firmly in the latter category. Imagine a velvety peanut butter filling cradled in a chocolate cookie crust, topped with clouds of whipped cream and, of course, more peanut butter cups. It’s the kind of treat that turns an ordinary Tuesday into a celebration.
Ingredients You’ll Need
- 1 ½ cups chocolate cookie crumbs – Oreo crumbs work beautifully here, but any chocolate sandwich cookie will do. Pro tip: if you’re grinding them yourself, a food processor makes quick work of it!
- 6 tbsp unsalted butter, melted – This binds our crust together, and using unsalted butter lets you control the saltiness.
- 1 ½ cups creamy peanut butter – Go for the good stuff here—natural peanut butter can separate, so a classic creamy variety like Jif or Skippy works best for that luscious texture.
- 8 oz cream cheese, softened – Leave it on the counter for 30 minutes before starting. Cold cream cheese is the enemy of smooth fillings!
- 1 cup powdered sugar – Sift it if you’re feeling fancy (it prevents lumps), but a good whisk will do in a pinch.
- 1 tsp vanilla extract – The secret whisper of warmth that makes everything taste homemade.
- 1 ½ cups heavy whipping cream – We’ll whip this into pillowy peaks to fold into the filling. Chilled cream whips up faster!
- 10-12 mini peanut butter cups, chopped – Because more is more when it comes to peanut butter cups. Freeze them for 10 minutes before chopping—it keeps the chocolate from melting everywhere.
Let’s Make the Magic Happen
Step 1: The Crust That Holds It All Together
Preheat your oven to 350°F (175°C). In a medium bowl, mix the chocolate cookie crumbs and melted butter until it resembles wet sand. Press this mixture firmly into a 9-inch pie dish, making sure to go up the sides. I like to use the bottom of a measuring cup to really tamp it down—no crumbly crusts here! Bake for 8 minutes, then let it cool completely. (Resist the urge to rush this step—warm crust + creamy filling = sad, melty pie.)
Step 2: The Peanut Butter Filling of Dreams
In a large bowl, beat the softened cream cheese until smooth and fluffy. Add the peanut butter and mix until fully combined—scrape down the sides of the bowl to make sure no sneaky cream cheese lumps are hiding. Sift in the powdered sugar (or just sprinkle it in if you’re like me and sometimes skip the sifter), add the vanilla, and mix until silky.
Step 3: Whip It Good
In another bowl, whip the heavy cream to stiff peaks. This is where an electric mixer shines, but a whisk and some elbow grease work too—just pretend you’re working off a slice of pie in advance. Gently fold the whipped cream into the peanut butter mixture in two batches. Be patient here; we want to keep all that airy lightness intact. Finally, fold in half of the chopped peanut butter cups (the rest are for topping, because balance is key).
Conclusion
This Peanut Butter Cup Pie is truly a dessert game changer—decadent, velvety, and packed with the irresistible pairing of peanut butter and chocolate. With its no-bake simplicity and crowd-pleasing flavors, it’s perfect for any occasion, from weeknight treats to holiday gatherings. The Oreo crust adds a delightful crunch, while the creamy peanut butter filling and chocolate ganache topping make every bite pure bliss.
Now it’s your turn to give this recipe a try! Whip it up, share it with friends and family, and let us know how it turned out in the comments below. And if you’re craving more indulgent desserts, be sure to check out our dessert recipe collection for more sweet inspiration!
FAQs
Can I make this pie ahead of time?
Absolutely! This pie actually tastes even better after chilling overnight, allowing the flavors to meld. Just store it covered in the fridge for up to 3 days.
Can I use a different crust?
Yes! If you prefer, you can swap the Oreo crust for a graham cracker crust or even a pretzel crust for a sweet-and-salty twist.
Is there a substitute for heavy cream?
For the ganache, you can use full-fat coconut milk as a dairy-free alternative. For the filling, a thick non-dairy creamer or whipped coconut cream may work, though the texture might vary slightly.
Can I freeze this pie?
Yes! Wrap it tightly in plastic wrap and freeze for up to a month. Thaw in the fridge before serving for the best texture.
How do I prevent the ganache from cracking?
Make sure the pie is fully chilled before slicing, and use a sharp knife dipped in hot water for clean cuts. If cracks happen, a sprinkle of sea salt or extra peanut butter cups can hide any imperfections!